Do you know how to test a golf cart motor? Golf cart’s motor is the most critical component for the golf cart. As a result, it should constantly be in good working condition in order to operate the cart properly. You should appropriately maintain a golf cart motor.
A golf cart motor may be manually tested with ease. However, it seems that manually testing is difficult at times. The following tests will help you diagnose a problem with the golf cart for any operational flaws or issues.
How to Test a Golf Cart Motor with Effective Steps
There are several ways to test the motor of a golf cart. People should experiment in various ways in order to get the most outstanding results. In this post, we’ll go through a few different strategies in order to see which ones work best for you.
Step-01: Test the Power Source
For testing, a cart motor may require a lot of charges. So, first, make sure the golf cart’s power supply is totally functional and powerful enough. When more charges are necessary for a golf cart, they also should confirm that the power supply is operational.
Some golf cart motors are capable of performing many functions. If the cart is also multifunctional and has an issue with one of the charging points, it will be simpler to repair the problem before repairing or replacing the golf cart’s motor. As a result, this method is beneficial.
Step-1.1: This work may need the use of a 120-volt tester. It is available for rent or purchase at any electrical store. To safeguard the probes from any unanticipated electric shocks, you should clean them. You can readily clean these places with a clean towel.
Step-1.2: The probes may now be inserted into the socket. Now, you should press the test key on the 120-volt tester. Everything will be OK if you get a consistent charge from the socket. You shouldn’t be concerned about the power outlet.
Step-1.3: You may now recharge the cart from another socket to see how it compares to the present socket’s performance. If this electrical socket gives you a positive result, you may use it to charge the golf cart where the test is being conducted.
Also Read : How to clean and maintain golf cart batteries in effective ways
Other Steps to Test a Golf Cart Motor
You are now lining up one step afterward to begin the motor test on the carts. Before starting the main testing procedure, you should be sure to complete a few preliminary measures. You should figure out what simple things you may use to avoid a disastrous circumstance.
Step-02: Reset the Motor
There are a slew of minor difficulties that might arise on a cart from period to period. All of which are relatively simple to fix if you take enough time to address them and don’t battle with the cart’s functionality. A simple motor reset can fix all these issues. So, how to reset the golf cart motor?
Step-2.1: You must first locate your motor’s ‘Reset’ button. It is vital to avoid a catastrophe. This button is located on the outside of your motor. This button is on the outside of several electric golf carts. The key may have a “Reset” label on it or not.
Step-2.2: After finding the reset button, reset the motor by pressing it. Additionally, it would be best if you attempted to restart the motor engine of your golf cart once again. This maneuver must be performed to restart the golf cart as frequently as feasible.
Step-03: Check the Terminals
Before you proceed with this step, we highly advise taking images of the motor’s wiring for future reference. After photographing the motor’s wiring, it’s time to check the terminals. Fortunately, this isn’t a difficult task to do with a bit of effort.
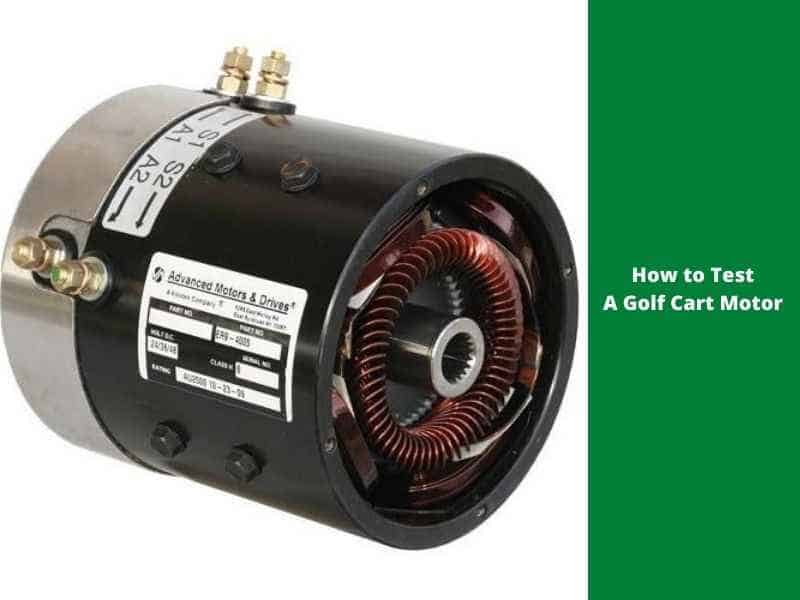
Step-3.1: Find the motor under the back of the golf cart by moving to the back of the automobile. Four wires will be attached to the upper front of the electric motor. A1, A2, S1, S2 are the designations for the 4 battery wire terminals. Before disconnecting the motor’s wires, use a pen or pencil to indicate each cable with the appropriate port number.
Step-3.2: Unscrew all the screws that keep the cables in place on each of the four battery posts. Pull the wires from the electric motor as well as place the screws in a safe place. Connect the A1 post of the motor towards the S1 post using a jumper wire. Now you should screw the battery connection nuts as well as tighten using the wrench.
Step-3.3: Connect one of the jumper cables’ negative leads to the thoroughly charged 12-volt battery’s negative terminal. Connect the negative jumper cable’s opposite end to the electric motor’s S2 post.
Step-3.4: Connect the positive wire to the 12-volt battery’s positive connector. Connect the opposite of the positive wire to the electric motor’s A2 connector. The engine should spin once the positive battery connection reaches the A2 connector, and the back wheels should also revolve. Remove the jumper wires and reattach the battery cables to the motor after the motor has been checked.
Step-04: Motor’s Solenoid Test
The solenoid is one of the crucial things of any motor, from minor to bigger. In a golf cart, the motor’s solenoid distributes the electrical power to keep it perfectly operating. So, you should test the cart motor’s solenoid carefully to ensure it is in excellent shape.
There are many different sorts of difficulties that may occur in this area. Each of these will maintain your cart’s solenoid in poor operational condition, resulting in you having to spend money to repair or replace the solenoid. Suppose the solenoid is performing poorly or is on the verge of breaking down.
To test the solenoid of the motor, you will need an Electrical tape, ½-inch wrench, and a Voltmeter.
Follow the step-by-step guide to test the motor’s solenoid:
Step-4.1: Using the wrench, separate the wires from the 2 more significant solenoid terminals. If you have a gas golf cart, the terminals will be connected to the starter. In the case of electric golf carts, the terminals are connected to the controller.
Step-4.2: After that, cover the ends of both the cable with electrical tape to prevent them from fraying. Maintain a safe distance between the wires in order to avoid a circuit forming in the event of inadvertent contact. Check to see that the cart orientation switches are in the stable position and that the key is not in the on position.
Step-4.3: Set the voltmeter or multimeter to ohms, then place one probe on each big terminal of the voltmeter. The reading of the voltmeter should be zero.
Step-4.4: Turn on the key, set the direction switch to forward, as well as push the accelerator. The solenoid will make a clicking noise, so keep attention out for it. If you hear a click, re-test the big terminals with the voltmeter; the reading should be 0–0.4 ohms. If the reading is higher, it indicates that the solenoid’s contacts are defective and should be replaced.
Step-4.5: Set the voltmeter to DC volts with a range of 200 if you don’t hear the click. Now you should place the probes on the solenoid’s tiny terminals. T turn on the key, sets the direction key to forward, and pushes the accelerator.
The motor’s solenoid is not really the issue if the reading of the voltmeter is zero. If there is no click and the voltage is complete, the coil has failed, and the solenoid must be replaced.
A golf cart motor should be tested on periodical basis to keep it always functional in an effective way and to ensure golf cart go faster with enhance performance.
The FAQs –How to Test a Golf Cart Motor
Do all golf cart motors have a reset button?
The majority of golf cart motors come with a specific button that acts as a miniature circuit breaker. It allows the engine to reset by pressing it. You will find this button on the right side of the motor screen; it is very visible since it is red.
How long does an electric golf cart motor last?
The typical gas, as well as electric golf cart engine, may endure for many years if properly maintained. However, the truth is that many individuals fail to maintain their golf cart engines properly.
Can you clean a golf cart motor?
Yes! You can clean a golf cart motor. If you wish to use soap, be sure it’s mainly developed for cleansing golf cart motors. While using a cleaner, be sure to wipe it away thoroughly with a dry cloth or paper towels to ensure it doesn’t stick to the cart’s motor.
Do golf carts have AC or DC motors?
Golf carts have always been powered by DC electricity. However, as manufacturers begin to see the advantages of utilizing AC power and motors, this tendency is starting to shift. You may convert any DC motor to an AC motor simply by consulting a competent engineer.
What is the cause of motor failure?
The breakdown of winding insulating and the wear of bearings are the two most typical reasons for motor failure. Those situations, on the other hand, might emerge for a variety of causes.
Final Thought
Maintaining a golf cart takes a great deal of attention, which includes routinely inspecting the engine. Early diagnosis and troubleshooting of motor issues may save you a lot of money in the long run in terms of repair costs.
Consequently, if you have problems, check to see that the motor is operating correctly by the instructions on how to test a golf cart motor outlined above.